
If you need the same character in a poster, product scene, storyboard, and video frame, a single portrait prompt is not enough. The useful asset is a character sheet: one visual source of truth that records the face, hair, silhouette, outfit, palette, expressions, and important props before you ask for cinematic variations.
You can open Image3, review the GPT Image 2 model workspace, or jump directly to Image3 Workspace with GPT Image 2 image editing selected. This guide gives you a repeatable prompt system, copy-ready examples, and a comparison checklist. It is designed for practical production, not a promise that every generation will be identical.
Start creating now
- Open the Image3 homepage
- Create the first sheet in GPT Image 2 text-to-image
- Edit the approved reference in GPT Image 2
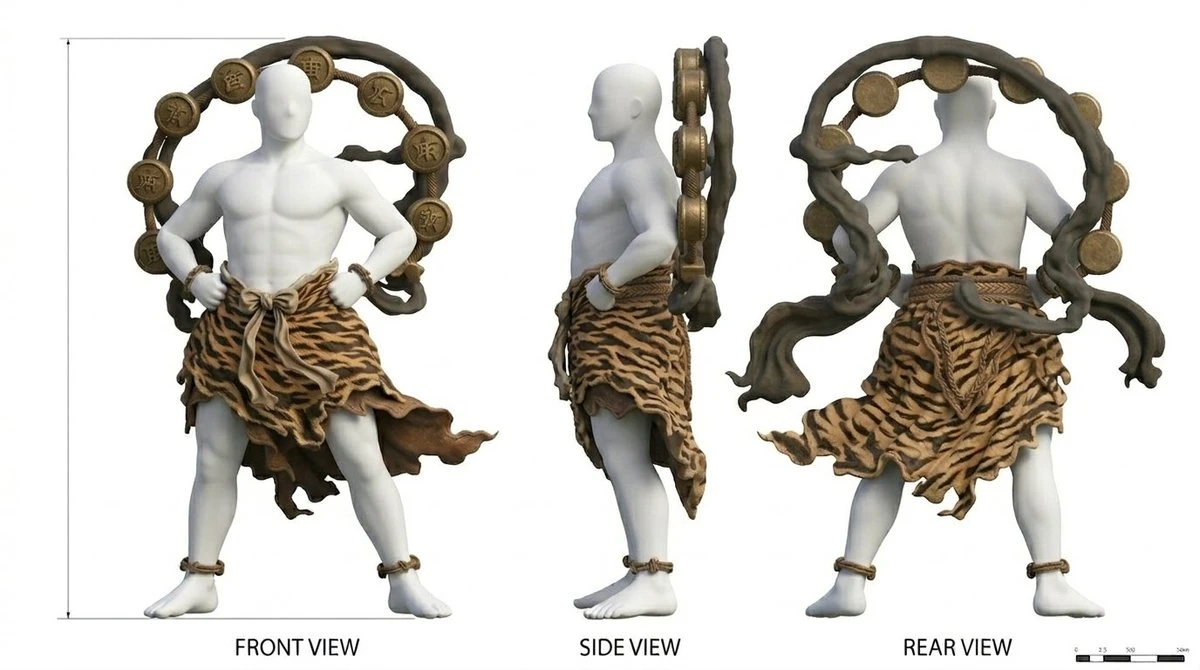
The short answer
Build the sheet in two passes:
- Generate a neutral front, side, and three-quarter turnaround.
- Use that sheet as the reference for expressions, outfits, scenes, and video frames.
The winning prompt separates fixed identity from changeable art direction. “Make the same person in a cool scene” leaves too many decisions open. “Preserve this face, hair, jacket, palette, and scar; change only the background and pose” gives GPT Image 2 a smaller, testable job.
What a character sheet must lock
Think of the sheet as a compact production brief. Lock the details that a viewer should recognize even when the camera, lighting, or setting changes.
| Anchor | What to describe | Why it matters |
|---|---|---|
| Face | face shape, age range, skin tone, eye shape, distinctive mark | prevents a new face in every view |
| Hair | cut, length, part, texture, color | one of the fastest identity signals |
| Silhouette | height impression, shoulder width, body proportions | keeps poses believable |
| Outfit | garment names, colors, layers, materials | protects continuity in scenes |
| Palette | two or three main colors plus accent | keeps a series visually related |
| Accessories | glasses, earrings, bag, tool, badge | recurring props can tell the story |
| Constraints | no extra logos, text, jewelry, or costume changes | removes common drift |
Do not start with adjectives such as “epic”, “beautiful”, or “cinematic”. Start with the identity anchors. Style is useful after the model knows who it is drawing.
The reusable prompt formula
Use this template for a first turnaround. Replace the bracketed details, then keep the identity block unchanged for later edits.
Create a clean character reference sheet for [character role].
Identity anchors: [face shape], [age range], [skin tone], [eye shape], [hair cut and color], [distinctive mark].
Body and outfit: [height impression], [body proportions], [garments], [materials], [main colors], [signature accessory].
Layout: front view, left side view, and three-quarter view in one evenly spaced row; full body; consistent scale; neutral studio background.
Look: realistic editorial concept art, soft even lighting, sharp silhouette, restrained color palette.
Constraints: keep the same face, hairstyle, outfit, body proportions, colors, and accessory in every view. No text, labels, logos, watermark, extra props, or additional characters.
The layout sentence is as important as the character description. A clean grid makes it easier to compare views and gives the next image edit a clear reference.
A complete turnaround prompt
This example is intentionally concrete. Concrete details give you something to inspect rather than a vague impression of consistency.
Create a full-body character reference sheet for a 29-year-old urban product designer. Show front view, left side view, and three-quarter view in one horizontal row, with equal scale and generous spacing. Preserve an oval face, warm medium skin tone, dark almond-shaped eyes, a short wavy black bob with a copper streak on the right, and a small beauty mark below the left eye. Keep the same proportions, relaxed posture, forest-green overshirt, cream T-shirt, charcoal wide-leg trousers, white sneakers, and orange utility pouch in every view. Use a neutral light-gray studio background, soft even light, realistic editorial concept art, crisp edges, and no text, labels, logos, watermark, extra jewelry, or additional characters.
Run this before asking for a dramatic location. If the neutral sheet is wrong, a busy scene will make the error harder to see and harder to fix.
Add expressions without changing identity
Expressions belong in a separate row or a separate edit. Keep the face and hair block identical, then change only the expression list.
Use the uploaded character sheet as the source of truth. Preserve the face shape, eyes, beauty mark, copper hair streak, hairstyle, outfit colors, and body proportions exactly. Create a clean five-panel expression strip of the same character: neutral, curious, focused, surprised, and relieved. Keep the head scale and camera distance consistent, with soft studio lighting and a plain light background. Do not redesign the face, change the age, add makeup, add accessories, or introduce text or labels.
If expressions are too subtle, adjust the expression words, not the identity paragraph. Changing both at once makes it impossible to know which instruction caused the drift.
Add outfit and prop details safely
A second detail pass is useful for costume teams, game references, and product characters. Ask for close-ups, but keep the same anchor block.
Use the uploaded character sheet as the source of truth. Preserve the same face, hairstyle, body proportions, forest-green overshirt, cream T-shirt, charcoal trousers, white sneakers, and orange utility pouch. Create a three-panel detail board: front outfit close-up, orange utility pouch with its zipper and strap, and white sneaker side profile. Use the same materials and colors, clean neutral background, soft light, and realistic editorial detail. Do not invent brand marks, extra pockets, jewelry, text, or new clothing.
The detail board is not a replacement for the turnaround. It is a supporting reference. Keep both, because the turnaround protects the silhouette while the detail board protects materials and props.
Use reference editing for new scenes
Once the sheet is approved, switch from exploration to controlled editing. Put preservation rules before the new scene so the model knows which parts are non-negotiable.
Use the uploaded character sheet as the source of truth. Preserve the same face, short wavy black bob with the copper streak, beauty mark, body proportions, forest-green overshirt, cream T-shirt, charcoal trousers, white sneakers, and orange utility pouch. Change only the setting and pose: place the character in a bright design studio, standing beside a large whiteboard and holding a marker in the right hand. Keep the character fully visible, use a three-quarter camera angle, natural window light, and open space on the left for page copy. No extra people, costume changes, logos, random writing, or facial redesign.
This is where the brand-style reference workflow becomes useful. It explains how to name preservation rules, inspect drift, and save a winning prompt contract.
Choose text-to-image or image editing
The two modes serve different stages:
| Stage | Recommended mode | Reason |
|---|---|---|
| First neutral sheet | Text-to-image | there is no approved source yet |
| New expression row | Image editing | face and hair should remain anchored |
| New outfit detail | Image editing | materials and accessories need a source |
| Poster or campaign scene | Image editing | the sheet protects continuity |
| Video hero frame | Image editing | a stable silhouette is easier to animate |
For the model choice, use the GPT Image 2 workspace for the first sheet and the image-editing workspace for controlled variations. Check the visible controls for the available size and output settings rather than assuming a setting is supported in every account.
Prepare a video-ready hero frame
A character sheet can feed a video workflow, but the best input is usually one clean hero frame rather than a crowded grid. Use a separate crop with a clear silhouette, neutral pose, and enough background separation.
Use the approved character sheet as the source of truth. Create one landscape hero frame of the same character standing in a relaxed three-quarter pose, full body visible, clean silhouette, forest-green overshirt and orange utility pouch clearly readable. Use a simple warm-gray studio background, soft directional light, and no motion blur. Preserve the face, hair, proportions, colors, and accessory. Do not add text, logos, extra characters, or a busy background. This frame will be used as the first image in a short character-introduction video.
The GPT Image 2 image-to-video workflow covers the handoff from a stable still to motion. Treat motion as a new stage: first approve identity in the still frame, then test camera movement and action.
Five failure modes and fixes
Face drift
Repeat the same face and hair anchors verbatim. Use a larger, clearer source and reduce the number of simultaneous changes. If the face still changes, return to a neutral portrait edit before adding a scene.
Outfit drift
Name garments as objects, not just a color. “Forest-green overshirt over a cream T-shirt” is more useful than “green outfit”. List the accessory that must remain and forbid new clothing.
View mismatch
A side view can expose missing details or a different hairstyle. Request equal scale, consistent lighting, and the same character in every panel. If the model invents a back view, do not add more views until the first three agree.
Overloaded prompts
When one prompt asks for six poses, ten props, a complex location, tiny labels, and a film-grade effect, the important constraints compete. Split the work into a turnaround, a detail pass, and a scene pass.
Reference contamination
Multiple references can help, but each image should have a role. Tell the model which image controls identity, which controls clothing, and which controls composition. If the roles are unclear, use one clean source first.
A practical comparison checklist
Before saving a sheet, compare the result against the source at the same zoom. Mark each item pass or revise:
- Face shape, eyes, skin tone, and distinctive mark
- Hairstyle, part, length, and accent color
- Shoulder width, height impression, and body proportions
- Outfit layers, materials, and main colors
- Signature accessory and its position
- Panel scale, pose direction, and spacing
- Unwanted text, logos, jewelry, props, or extra people
- Clean silhouette and enough contrast for a later video frame
If two items fail, revise the prompt contract instead of polishing the result. A beautiful image with an unstable identity is not a useful reference.
A repeatable production loop
Use this loop for every new character:
- Write the identity anchors in a short, reusable block.
- Generate a neutral three-view turnaround.
- Reject drift before adding style or story.
- Create an expression or detail board in a separate edit.
- Save the approved sheet and prompt together.
- Build one scene at a time, changing one major variable.
- Create a clean hero frame before testing video.
This process is slower than asking for a finished movie still in one prompt, but it produces assets you can reuse. It also makes failures diagnosable: you know whether the issue came from identity, layout, costume, or scene direction.
What GPT Image 2 cannot guarantee
Reference images reduce ambiguity; they do not create a deterministic character rig. Small facial details, hands, text, and accessories can still change. Treat each output as a candidate that needs comparison. For commercial work, keep the approved source, the prompt contract, and the final selection together so a later revision has a clear baseline.
There is also a useful distinction between identity consistency and image similarity. Two outputs can have different lighting, crop, and pose while still depicting the same character. Conversely, two images can share a palette and jacket but show different faces. Review the anchors in the table first, then judge the overall style. This prevents a dramatic but inaccurate frame from becoming the new source of truth.
When a revision fails, save the failed output beside the prompt that produced it. Write one sentence describing the first visible error: “the copper streak moved,” “the pouch disappeared,” or “the side view changed the jaw.” Then change only the instruction connected to that error. This small log turns prompt iteration into a controlled experiment and prevents you from reintroducing an old mistake several generations later.
For a team, name files with the character, version, and purpose, such as maya-turnaround-v03, maya-expression-strip-v02, and maya-video-hero-v01. Keep the exact prompt in the same folder or project note. If a client asks for a new scene six weeks later, the team can identify which sheet was approved instead of relying on a screenshot copied into a chat.
Use a fresh edit when the source has accumulated too many changes. Repeated edits can slowly alter the face or costume even when each individual change looks harmless. Return to the approved turnaround, make the next single change from that clean source, and compare the result with the previous approved frame. A clean reset is often faster than trying to repair a drifting derivative.
Finally, decide what “consistent enough” means before you generate a batch. A social thumbnail may only need the same silhouette and palette. A storyboard may require face, costume, and prop continuity. A product mascot or paid campaign may require a human review of every frame. The prompt can reduce variation, but the acceptance threshold is a production decision, not a model setting.
One last habit helps when the character will appear in several languages or markets: keep the visual identity block language-neutral where possible. Describe observable features, materials, colors, and positions instead of relying on cultural shorthand or idioms. Translate the surrounding art direction for each audience, but keep the fixed anchor list equivalent. That makes localized scene prompts easier to compare and reduces the chance that a translation accidentally changes the character.
It is worth keeping one untouched master sheet as well. Make working crops and scene edits from copies, never from the only approved file. When a new campaign asks for a different hairstyle or prop, you can branch from the master and decide deliberately whether that change becomes a new version. This simple version boundary protects the original identity and gives the team a dependable rollback point.
Final checklist and next step
The reliable pattern is simple: lock identity first, use a neutral sheet, change one variable at a time, and inspect every output against the source. Start with Image3, make the first sheet in GPT Image 2 text-to-image, then move to GPT Image 2 image editing when continuity matters.
For more prompt patterns, browse the GPT Image 2 prompt guide and keep the product photo workflow nearby when your character is presenting a product. Save the winning prompt, reference sheet, and comparison notes as one small production package.
How to apply this
- Define the identity anchors
Write the face, hair, body proportions, outfit, palette, and signature accessories that must remain stable.
- Generate a neutral turnaround
Create front, side, and three-quarter views on one clean sheet before adding a dramatic scene or camera angle.
- Add expression and detail rows
Use a second edit for expressions, hands, props, and material close-ups instead of overloading the first prompt.
- Use the sheet as a reference
Upload the best sheet in Image3 Workspace and state what to preserve before describing the new scene.
- Compare and lock the winner
Check identity, silhouette, palette, outfit, and accessories; save the prompt contract before making the next variation.
Frequently asked questions
What is the best GPT Image 2 character sheet prompt structure?
State the job, identity anchors, views or grid, layout, visual treatment, and strict preservation rules in that order. Put the details that must not drift near the beginning.
How many views should an AI character reference sheet include?
Start with front, side, and three-quarter views. Add a back view only when costume construction or a recurring prop matters to the next scene.
Can GPT Image 2 keep the same character across scenes?
A reference sheet improves continuity, but it is not a guarantee. Preserve the identity anchors, change one major variable at a time, and compare every result with the source.
Should I use text-to-image or image editing for a character sheet?
Use text-to-image for the first neutral sheet and image editing when you need to preserve a face, outfit, palette, prop, or existing pose.
Why does a character sheet produce different faces?
Face drift usually comes from vague identity wording, too many simultaneous changes, tiny source references, or treating each view as a new character. Repeat the same identity block and simplify the layout.
How do I prepare a character sheet for video?
Keep the silhouette clear, avoid motion blur and busy backgrounds, and create a clean hero frame. Then use the image-to-video workflow after the character reference is approved.
What should I do when the output adds extra accessories?
List the required accessories and explicitly forbid new jewelry, props, logos, text, and costume changes. If the issue continues, edit the sheet in a separate pass.